
How to paint a full moon in Gouache - Free Step-by-Step Art Tutorial
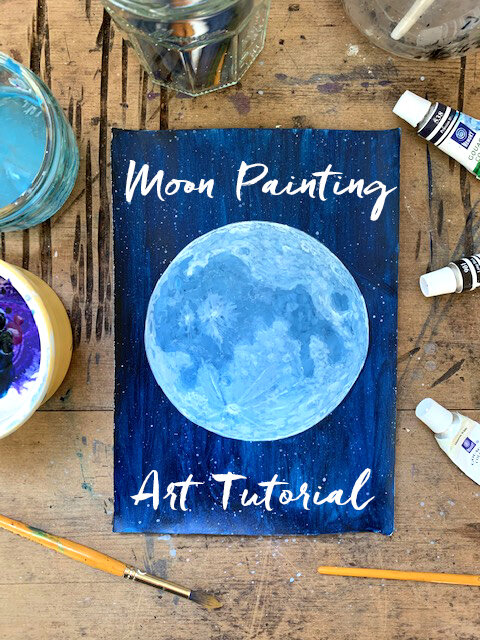
Learn how to paint a full moon, with easy to follow step-by-step instructions! Our celestial neighbour has inspired artists throughout history, with its constant waxing and waning from new moon to full moon and back again. The full moon especially, have inspired countless myths and artwork throughout the ages. In this blog post we will teach you how to create your own dramatic full Moon artwork using gouache paints.
Have fun trying our Moon painting tutorial!
Materials
For this project you will need:
Watercolour Paper
Gouache Paints (blues, black and white)
Gouache works best for this particular project, but acrylic paint can also be used for a similar effect. Most importantly, use paints that are opaque and can paint over a dark background.


Method
Step-by-Step Instructions:
Paint your moon artwork background in dark blues with a hint of black. Mix a few different shades of blue with a little black to create a dark blue dramatic background colour. This will be the backdrop for your full moon painting. Fill the whole paper with paint then leave to fully dry. Gouache dries very quickly, acrylics it will take slightly longer. Tip: Keep some of this blue paint mixture to tidy up your painting at the end.
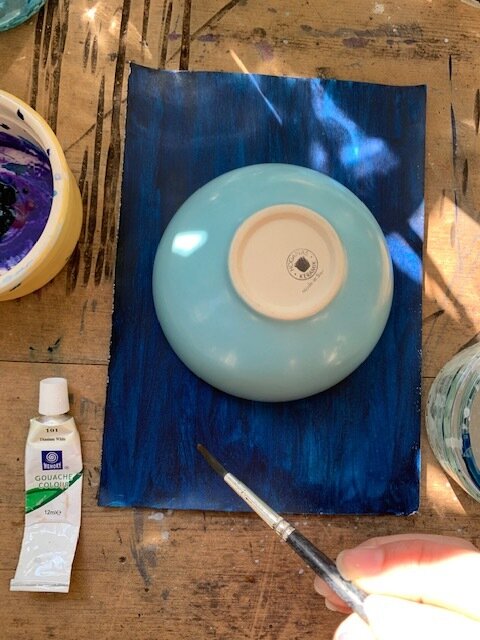
When the background painting is completely dry, it’s time to start painting your full moon. The full moon painting will look best if it’s a perfect circle. Use a template, such as a plate or bowl to create the full moon shape. Place your template object on the centre of the background painting then use white paint to paint around the template edge.
Before removing your template, take a dry old brush, dip it in white paint and flick some paint specks on the background painting to create stars in the night sky.
Remove the template and you should have a white circle in the middle of your painted background. Carefully fill the circle with a layer of thin white paint. The paint should be mixed with water, allowing some of the background colour to shine through. Aim for much paler than the background, but not completely white. Once you have filled the whole circle, leave to fully dry. The white gouache paint will mix a little with the blue background paint and can create interesting patterns as it dries. If it becomes too dark, just add another thin white colour-wash and leave it to dry again. This is the base for your full moon.
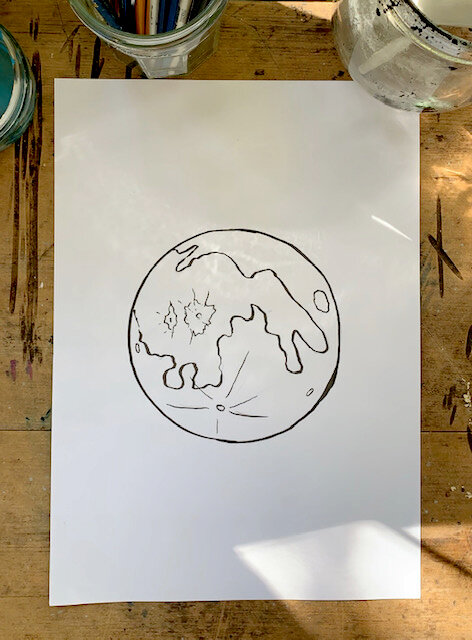
Now it time to build up the interesting shapes, shadows and craters that you can see on the surface on the moon. Things to look out for: the distinctive Tycho crater, the Copernicus crater, the moon rabbit shape and Lunar Maria, such as the Sea of Crises, and Sea of Tranquility. Have a look at our example image above for some shapes to include in your painting. For a more realistic result, look a reference picture of the moon for this stage of the painting.
Use white paint to add details to the moon and leave the background colour for the darker areas, such as the Sea of Tranqulity etc. Paint the most prominent shapes first, such as the edges of ‘moon rabbit’ shape, the Tycho Crater and the Sea of Crises, using simple lines. Tip: Add a bit of yellow to the white paint to get a creamy white mixture, if you would like a warmer glow for the moon.
Keep building up layers of white areas of the moon and add details, such as craters, as you go along.
Finally tidy up the painting with fine details. Add a thin white line all around the inner edge of the moon, then leave to dry. Finish off by painting adding a very fine line of the background blues (saved from Step 1) around the outer edge of the moon to tidy up any paint bleeds etc.

Your full moon painting is done!
Variations:
In Step 2 Add moonshine around the outer edge of the moon, using a lighter blue colour closest to the moon, to show it glowing.
Try different colours, by using a different background colour for the moon in Step 4
Skip the background painting part and just use a coloured background paper (black or dark blue will work well). Use white paint to paint your moon as above from Step 2
If you try this project, tag us on Instagram @drawntogetherart and we will try to share your moon painting on our stories.
Enjoy the process!