
7 Rainbow Art Projects

We love seeing all the rainbows in the windows at the moment! We have compiled a collection of 7 different rainbow art projects, using a variety of techniques. These art projects are suitable for all ages and abilities. They are a great way to practice mindfulness and enjoying the process of creating some colourful art. Do display your favourite rainbow artworks in your windows to spread the cheer…
We hope you’ll enjoy these fun, arty rainbow projects!
1. Watercolour Splash Rainbow Art
Try creating your own splashy watercolour rainbow. Play with colour, textures and shapes in this fun art project.
You’ll need some watercolour pens and a piece of paper. If you don’t have watercolour pens, try experimenting with any non-waterproof pens and see what textures you get when adding water...

Choose your colours. The classic colours of the rainbow work well for this project. You could also try other combinations: Blue, pink and indigo? Green, blue and purple? Try a few different ones!
Draw your rainbow using the watercolour pens. Use a template, or go freehand and experiment with some different shapes. Try attaching the pens together and drawing the rainbow in one sweep.
Apply water. A wide brush works well for this project. Remember to clean the brush between strokes. It’s a good idea to try to complete this painting using as few strokes as possible. You don’t want the colours to mix too much and become muddy and muted.
Leave it to dry. Turns out watching paint dry can be quite fun... Your painting will change as it dries and hopefully create some interesting patterns. Leave until fully dry.
Enjoy the process! This project is about experimenting with textures, colours and shapes. Sometimes you get unexpected results and interesting patterns.
2. Rainbow Collage Art

Use cut-out pieces of paper in different colours to create a rainbow collage artwork.
For this project you will need; old magazines, a pair of scissors, glue and a thicker piece of paper, or card, to use as a base for your collage.
Method:
Collect material in different colours to use in your collage artwork. Look in magazines and brochures etc. Did some of your watercolour splash artworks not turn out how you expected? No problem, use them for this project! Look for interesting textures and patterns.
Cut out pieces of different colours from the material gathered. Arrange the pieces in different piles according to the colours of the rainbow.
Work out the design of your artwork. You could do a classic rainbow shape, or just fill the page with rainbow colours, starting with red, moving on to orange then yellow and so on. Lay out your design on the piece of paper or card. Alternatively, work it out as you go along, one piece at a time….
To create your rainbow collage artwork, glue the coloured pieces of paper onto the card, in the order they appear in the rainbow. If you’re not happy with piece after gluing it down, don’t worry, just stick another piece on top. Tear the pieces of coloured paper to create the shape you’re after. This is a great way of ‘blending’ colour together.
This project is all about combining colours, shades and shapes. Try arranging the cut-out pieces in different ways to see what pieces work best next to each other. Experiment with how you can blend one colour to another.


3. Rainbow Wax Crayon Project
This is a fun crafty project to do with wax crayons. For this project you’ll need; a piece of thick card, a hairdryer, as well as the wax crayons. If any children are trying this, make sure they are accompanied by an adult.
Method:

Colour a rainbow onto the card using the wax crayons - make sure the wax is applied very thick.
Using a hair dryer, direct the heat onto the rainbow until the colours of the wax crayons start to melt.
Change the direction of the heat from the hair dryer to play around with different effects.
Let it cool down and you’re done!
Some people like to photocopy and print off their finished piece to make it into a contemporary looking art print.
4. Impasto Acrylic Rainbow
This is a fun and messy way to create a rainbow. All you need is paper and acrylic paints!
Make sure your paper is arranged landscape.
In the top centre squirt a blob of each colour of the rainbow in a column. Make sure the colours don’t go into the bottom half of the page.
Using your fingers and starting with the top colour, drag the paint out either side of the dots down into an arch.
Continue this with every colour, washing your hands between each colour
You should have an impasto rainbow once it’s completed!
5. Modern Monochrome Rainbow

Use different shades of one colour to create a contemporary looking rainbow. You will need A4 or A3 paper, some paints (acrylics, gouache or watercolours paints all work well) and a medium size brush.
Draw your rainbow shape on a piece of A4 paper. Try a long abstract rainbow shape for a contemporary geometric look. Feel free to use our template.
Pick out (or mix) different shades of your chosen colour.
Play around with different effects. Lightest colour in the middle then darker for the outer lines, or darkest in the middle etc. Clean the brush thoroughly when changing shade.
Make a few of these rainbow artwork paintings in different colours and display them together.
Try experimenting with different versions of these rainbows. Maybe add a hint of the adjacent colour on the colour wheel, to show a transition between hues? Maybe do one in each colour of the rainbow?


6. Abstract Rainbow Painting

Make a simple, but effective abstract rainbow painting. You will need acrylic paints, a piece of thick paper (or canvas if you have one) and a palette knife.
Pick out (or mix) the 7 classic colours in the rainbow; red, orange, yellow, green, blue, indigo, and violet.
Apply dots of paint to the paper, following the pattern of the rainbow. Fill the whole paper, or canvas, with paint dots. Alternatively start with dots of one colour then add dots of the next colour as you go along.
Using a pallet knife (a thick brush will also work), start blending the paint dots together. Be careful to not to mix the different colours too much, or the paints will become muddy and muted.
When you have blended all the dots and covered the entire paper (or canvas), go over and fix any mistakes with a clean pallet knife or brush, again being careful to not to mix the colours too much. Don’t overwork the painting.


7. Neutral Coloured Rainbow
This is a great idea if you just want a rainbow that’s more subtle with a contemporary feel. Repeat any of the stages above with neutral colours. Here are some colour ideas:
Dusty browns: Take one shade of brown and squeeze out 3 blobs of paint. Add white to one, add blue to another, and black to the third. Complete one of the above tasks with these mixtures.
Pastels: Add white to any colour to make a pastel version.
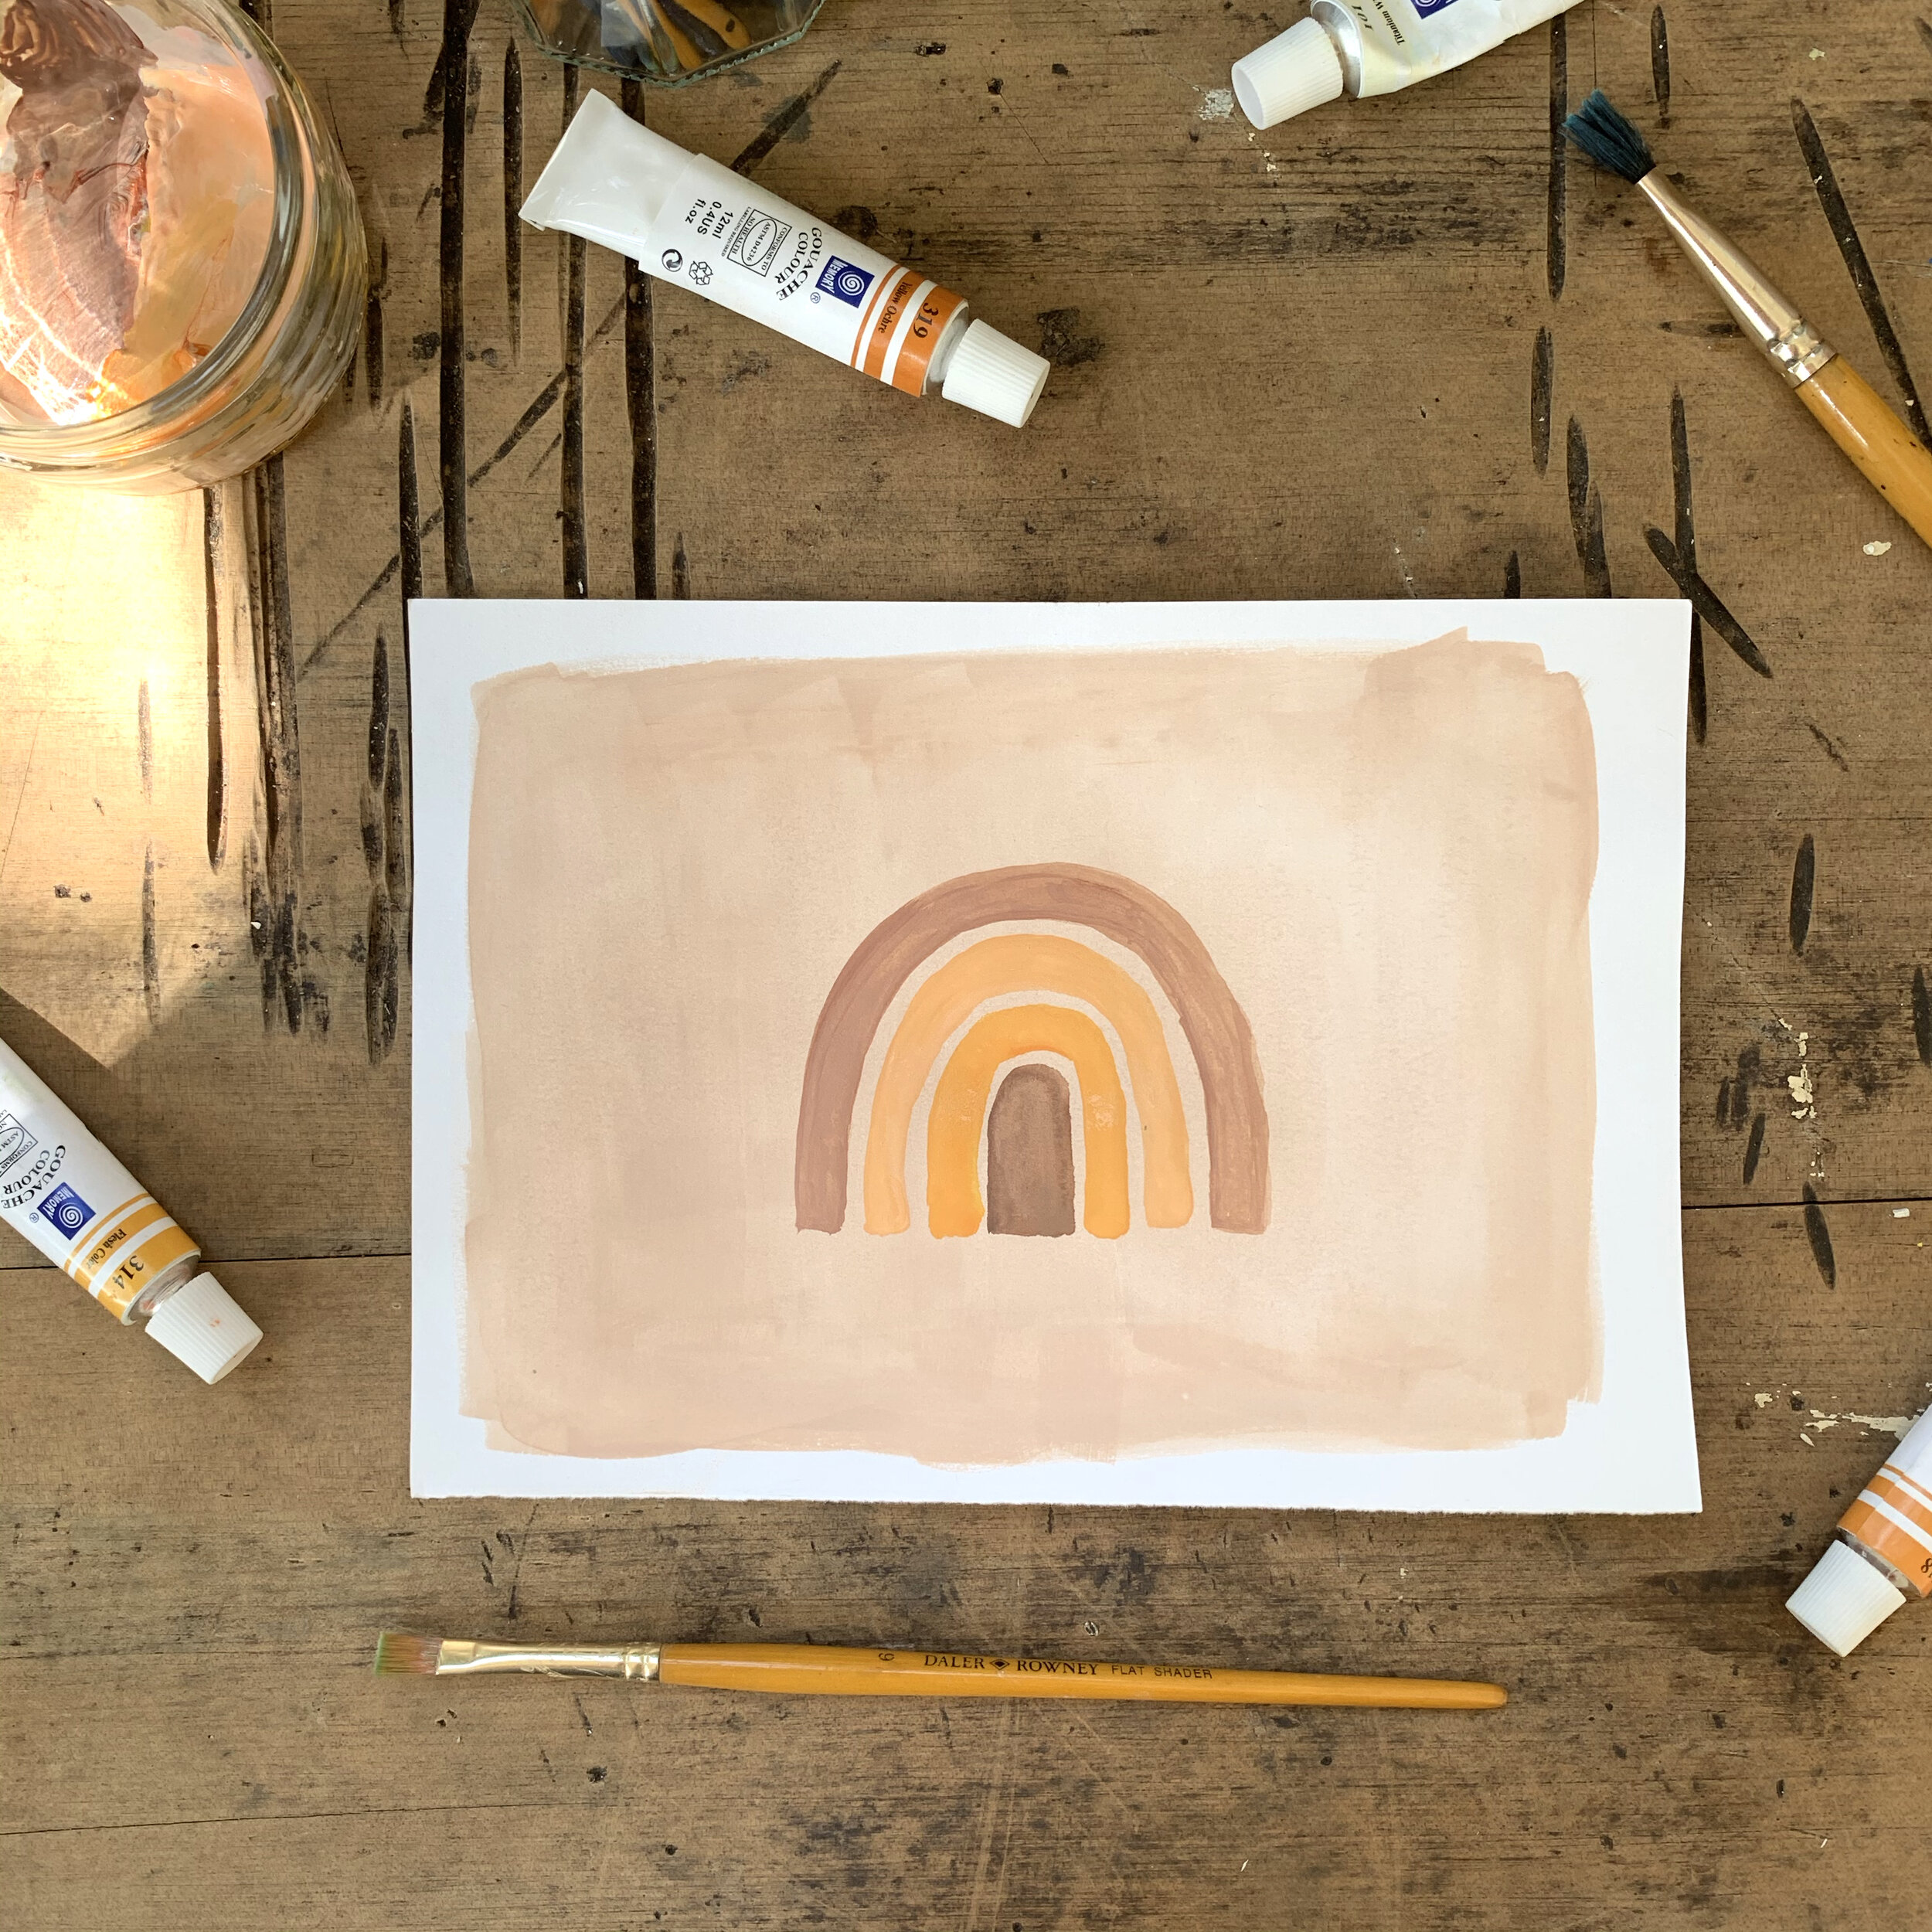
Use earthy natural tones for a modern looking rainbow artwork! Other ideas: make your rainbow more abstract and play with some different shapes. Can you make it more geometric?
Share your rainbow artworks
We hope you enjoy these fun rainbow art projects! We would love to see the results if you try one of the projects. Tag us on Instagram @drawntogetherart and we might share your rainbow artwork!
Maria and Rebecca